TIAO Smart Sprinkler Pi Controller User Manual

10 PCS, 10cm x 10cm, 2 layers prototype for $38.80 shipped!
Contents
- 1 TIAO Smart Sprinkler Pi
TIAO Smart Sprinkler Pi
For system connection diagram, please refer to TIAO Smart Sprinkler Pi System Connection Diagram. For hardware layout, please refer to TIAO Smart Sprinkler Pi Hardware Layout.
The TIAO Smart Sprinkler Pi (TSSPi) is a piece of hardware controls your irrigation systems. It replaces your traditional sprinkler controller. TSSPi has many benefits over the traditional sprinkler controller:
The controller software is built-in to our Raspberry Pi image, which is available here. (Based on RASPBIAN (Debian Wheezy, Version:September 2014, Release date:2014-09-09, Kernel version:3.12, the controller is built into our disc image file)
TSSPi Controller Software Features
- Easy setup - no monitor nor keyboard required for raspberry pi, only a network cable or USB wifi adapter
- Web interface - program the watering schedule using your PC or mobile phone
- Supports complicate watering schedules
- Unlimited watering schedules
- Allow seasonal adjustments
- Weather API access - automatically adjust watering amount/time by checking online weather forecast (rain/wind etc)
- Control your sprinkler stations from anywhere in the world
- Software supports unlimited stations
- Controls 1 to 16 stations(or 1 master station + 15 stations)
- Supports rain sensor
- Open source software - which means you can add your own function to the controller!
- System ON/OFF hardware switch
- Status LEDs (power, Pi power, system on, system running)
- Tap start/stop - simply tap on the screen to start or stop the stations
- Recommended browser - Google Chrome
Installation
The TSSPi controller software is pre-installed in our Raspberry Pi SD image, you can download it from here.
The image compressed in 7Z format, you can uncompress it by using 7Zip or peaZip.
After you have uncompressed it, follow the instructions from http://www.raspberrypi.org/documentation/installation/installing-images/ to load the images on the SD card.
Hardware connection
Your raspberry Pi is getting power from TSSPi, so no separate power needed for Pi. The required connection to your Pi is a network cable or a supported USB wifi adapter. For sprinkler connections, please follow this page: TIAO Smart Sprinkler Pi System Connection Diagram.
Make sure all connections are correct, then connect the power wires.
System configuration
The initial configuration includes network configuration, timezone setup and sprinkler station setup.
Network configuration
We have configured the Raspberry Pi image file to use static IP (192.168.1.70) for your Raspberry Pi.
If you plan to use wired connection, just plug a network cable from your home router to Pi, then you are done. You can continue it on the timezone setup section.
If you plan to use an USB wifi adapter, you have two ways to configure the wireless settings for your Pi.
USB wifi adapter supports Access Point (AP) mode
The AP mode means you can use your USB wifi adapter as a router, so you can connect your phone or laptop wirelessly to your Raspberry Pi directly, so that you can setup your Raspberry Pi's wifi using your phone or laptop.
- Insert a USB wifi adapter which supports to one of the USB ports of your Raspberry Pi. Wait at least 1 minute to allow system to boot up.
- Use your device (phone/tablet or laptop) to connect to wifi ssid: TSSPi_AP, password is sprinkler.
- Open Chrome or any browser, use this address: http://192.168.1.70, you will see this:

Click on Advanced and select "Proceed to 192.168.1.70":
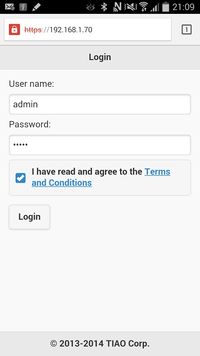
- In login page, the default user name is admin, password is admin (You can change this later). Select accept Terms and Conditions, then click Login.
- You are at the home page of TSSPi. Click on Wifi Setup:
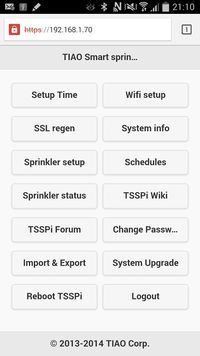
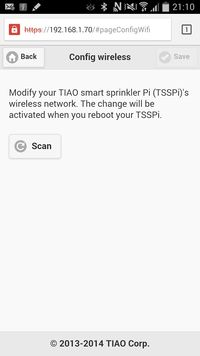
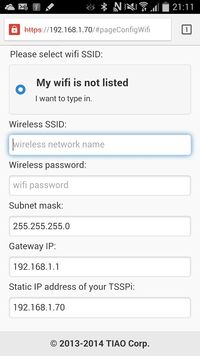
- At the wifi setup page, click Scan button, then fill in the wifi credentials and click Save button at the top right corner of the screen. We recommend to only modify ssid and password fields.
- You need to reboot your Raspberry Pi in order for it to connect to your home network. Go back to home page by clicking on the Back button at the top of left corner of the screen (do not use browser's back button, or your device's back button, always use Back button from TSSPi), then select Reboot TSSPi:
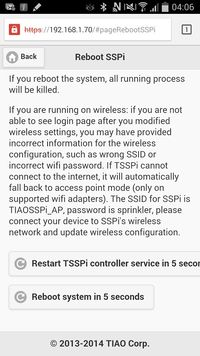
- Your TSSPi will reboot in 2 seconds and you will be redirected to login page in 2 minutes. If you have provided corrected ssid and password, TSSPi should connect to your home network after the reboot. Connect your phone or laptop back to your home network, then try to log in, if you can log in, then your wifi configuration is configured successfully. If you have provided wrong information, or TSSPi cannot connect to internet, it will fall back to AP mode, repeat from step 2 and provide correct information.
USB wifi adapter does NOT support Access Point (AP) mode
If your wifi adapter does NOT support AP mode, then you need a network cable to setup the wifi.
Use a network cable to connect the Raspberry Pi to your home router, then follow the above instruction from step 3 to config the wifi. (The device used for config the TSSPi need to connect to the same home network).
Timezone setup
The default timezone is America/New York, if this is not your timezone, you need to config it.
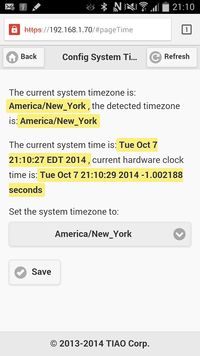
Go to the home page of the TSSPi, select "Setup Time". The page will try to detect your default timezone and pre-select the drop down menu. If your timezone cannot be detected, or the detected timezone is incorrect, select the correct timezone from the drop down menu and tap on Save button:
Change password
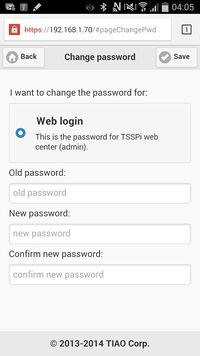
The default password for admin is admin. For security reasons, please change the password as soon as possible. Click on "Change Password" button in home page, then follow the instruction to change the password:
Sprinkler steup
In this step, you provide some basic information of your sprinkler system, e.g. total stations, whether the system has a rain sensor or not.
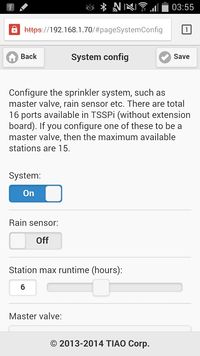
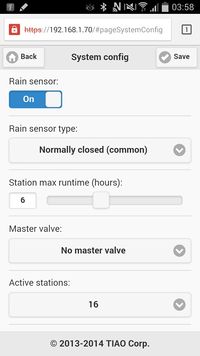
Click "Sprinkler Setup" button on home page to go to sprinkler setup page:
- System On/Off: There are two ways to turn the system ON of OFF. You can toggle this button, or hold the hardware button for 3 seconds to turn on/off the system. If the system is off, you sprinkler cannot be turned on until you turn the system off. S1 LED on the TSSPi indicates the system status, if the system is ON, S1 will be ON, otherwise S1 will be OFF.
- Rain sensor: Toggle this button to indicate whether you have a rain sensor connected or not. You can suppress rain sensor in your watering schedule.
- Rain sensor type: the most common type is normally closed. Otherwise select normally open.
- Station maximum run time: Configure the maximum allowed station run time.
- Master valve: If you have a master station/valve, set it it to port 16 here, otherwise select no master valve.
- Total stations: This is the total stations in your system (not including master valve). If port 16 is configured as master valve, then the total available ports are 15.
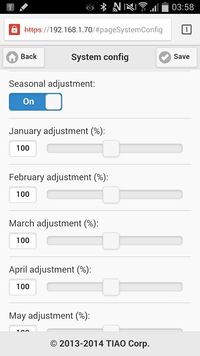
- Seasonal adjustment: This allows you to adjust watering time by month. For example, if station is configured to run for 20 minutes, you set the July's adjustment is 150%, so in July, you station is going to run 30 minutes.
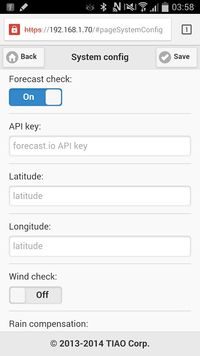
- Forecast check: If the TSSPi is connected to internet, you can configure the system to check the forecast before it turns the stations.
- API key: TSSPi uses forecast.io API to check the forecast. You can apply an API key at https://developer.forecast.io/register, then paste the API key here.
- Latitude and Longitude: Input your latitude and longitude here, your browser should be able to automatically fill in this for you.
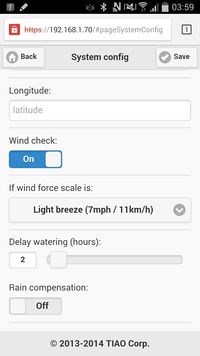
- Wind check: Allows the system to delay watering if the wind force is exceeding a certain amount.
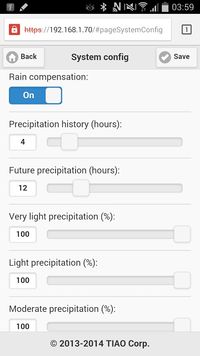
- Rain compensation: Automatically adjust watering amount if it has rained hours before the schedule, or it is going to rain soon.
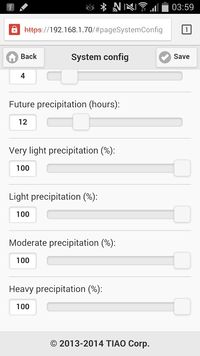
- Precipitation history: how many hours of precipitation TSSPi needs to check before the scheduled watering time.
- Future precipitation: how many hours of precipitation TSSPi need to check after the scheduled watering time. TSSPi use both precipitation to determine the compensation.
- 0.002 in./hr. corresponds to very light precipitation, 0.017 in./hr. corresponds to light precipitation, 0.1 in./hr. corresponds to moderate precipitation, and 0.4 in./hr. corresponds to heavy precipitation.
Schedules
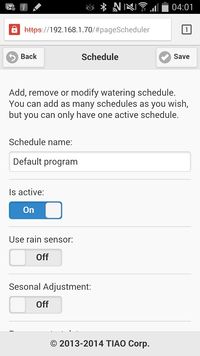
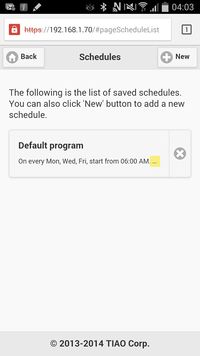
Once the system is configured, you can add or change schedules. Go to the home page and select Schedules button:
- Select New to create a new schedule.
- Is active: Set this schedule to be the active one. You can only have one active schedule.
- Use rain sensor: Turn on to use the rain sensor. The rain sensor must be turn on in system config in order for this to work.
- Seasonal adjustment: Turn on to use the seasonal adjustment configured in system config.
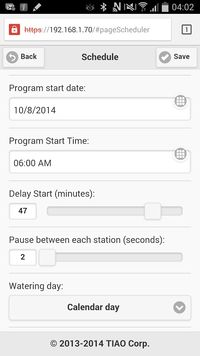
- Program start date: The start date of the schedule.
- Program start time: The start time of the schedule.
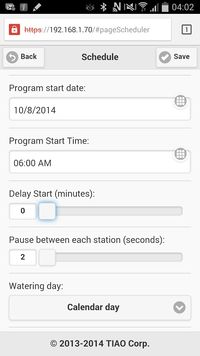
- Delay start: leave to the default value, unless you want to delay the start.
- Pause between stations: Usually you need allow a few seconds between each stations.
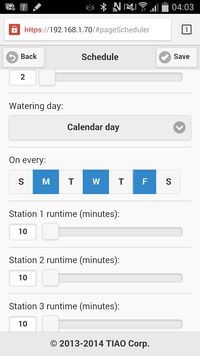
- Watering day: You can config system to water your lawn on calendar day, every odd days or even days.
- Station x run time: Configure each station's run time. The actual run time is calculated based on seasonal adjustment (if it is enabled) and forecast check (again, if it is enabled).
Status
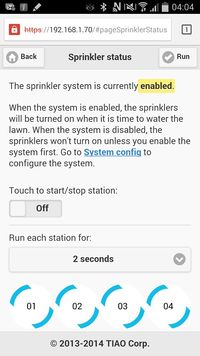
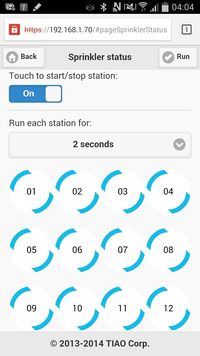
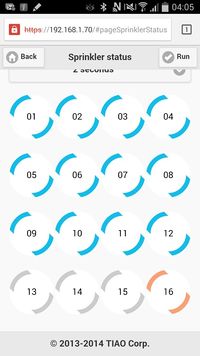
You can go to status page to check the station status.
- Touch to start/stop station: When enabled, you can turn on or off the stations by simply tap on the station icon. If a station is enabled, the ring color is blue. If the station is disabled, the ring color is grey. Master station is rendered in orange. If the station is on, you will see it spins. If the system is turned off, all stations are rendered in grey and the rings do not have any angle. If the schedule is running, you can also use hardware button to turn it off, keep holding the button will turn off the system too.
- Run each station: A quick test method to check the stations. Select the time and tap the Run button on the right top corner.
Import or export system configuration and schedule
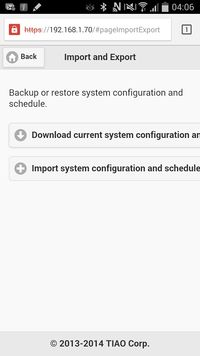
You can export the system configuration and schedule to your PC for backup, you can also import the previous exported configuration and import it in your TSSPi:
Restart controller software or reboot system
If things go wrong you can either restart the controller software or reboot TSSPi:
System upgrade
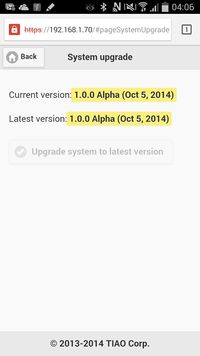
You can upgrade your controller software if there is a newer version available:
Support
If you need any support or report any issue of the controller software, you can ask it in our forum: http://www.tiaowiki.com/forums/index.php?board=22.0

10 PCS, 10cm x 10cm, 2 layers prototype for $38.80 shipped!
