Difference between revisions of "Hacking JP1 Remotes"

10 PCS, 10cm x 10cm, 2 layers prototype for $38.80 shipped!
| Line 59: | Line 59: | ||
''The article is provided by J.M, a member of JP1 community at http://www.hifi-remote.com | ''The article is provided by J.M, a member of JP1 community at http://www.hifi-remote.com | ||
| − | You can download the original WORD version of the article at: [[Hacking_JP1_Remote_Controls.pdf]] | + | You can download the original WORD version of the article at: [[Media:Hacking_JP1_Remote_Controls.pdf]] |
Thanks J.M.!'' | Thanks J.M.!'' | ||
Revision as of 23:53, 14 March 2009
by J.M.
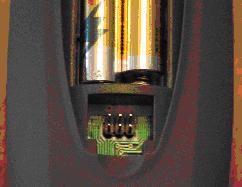
Have you ever seen a connector like this labeled "JP1" on the back of a remote control and wondered what it was for?
Getting Started
The JP1 connector is originally what the remote manufacturer uses to program it at the factory, but using a special cable you can connect it to your computer and reprogram the remote. You can backup your settings, add new device codes to the remote, or even create your own devices if your remote has a learning feature. And actually, some of the device upgrades you can use for these remotes can have unexpected features. A device upgrade I found that worked with my stereo had a functioning sleep timer button, something my stereo's original remote didn't even have!
First, you need a remote with a JP1 connector, or at least a remote that has holes in the circuit board where you can solder a JP1 connector. Next, you need to build or buy a JP1 cable. I would suggest you just buy one already made. They cost about the same price as the parts, and are a lot less of a hassle. You can get a parallel port version of a JP1 cable online for around $15, I bought mine from http://www.diygadget.com. Just be careful when you buy a JP1 cable, you have to buy a cable type that precisely matches the label on your remote's connector. If your remote's connector is labeled "JP1.2" you have to buy a cable that says it is compatible with JP1.2, you can't just buy a JP1 cable and expect it to work on everything. http://www.hifi-remote.com/jp1/index.shtml
Setting up the software
Once you get the remote control and a JP1 cable, you need to download some software. First, download the latest version of IR and the RDFs. When this was written, the latest versions of these files were "IR620.ZIP" and "RDFs_for_IR_and_RM_Version_1.17.zip". You can download these files in the "File Section" of the JP1 Forums, they're under Tools -> Main: http://www.hifi-remote.com/forums/dload.php?action=category&cat_id=81
Now, create a folder and extract the IR zip file to it. Then create a subfolder called "RDF" and extract the contents of the RDFs zip file to that folder. The first time you run IR, go under the File menu and select "Set RDF Path", and select the RDF folder you just created and extracted the files to.
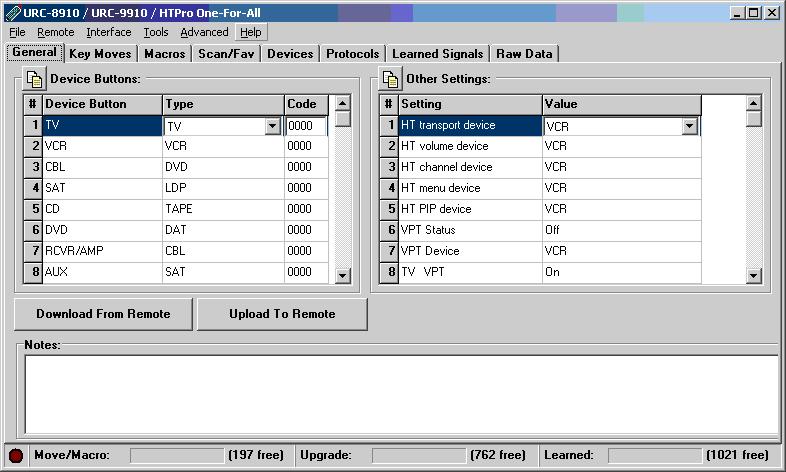
With IR.exe, you can download and modify the settings from your remote, as well as create backups of your remote's settings so if anything happens to the remote, and it looses its memory, you can easily reprogram it with all of your customizations. And depending on your remote's capabilities, you can modify things like key moves, macros, learned signals, device upgrades, and more.
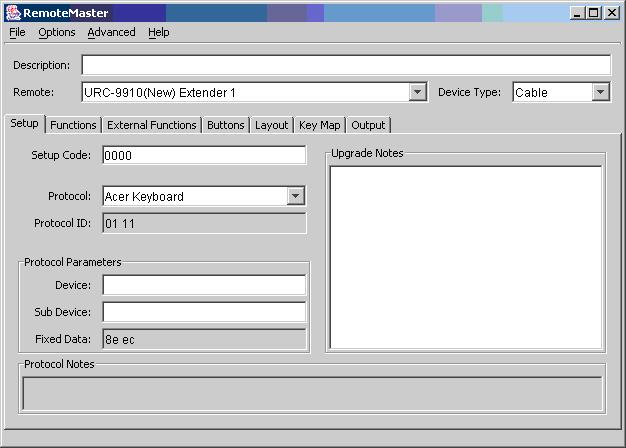
To create upgrades for the remote, or to use upgrade files other people have created, you will need a Java program called RemoteMaster.
- First, download and install the Java 2 Platform (J2SE) version 1.4.1 or later: http://java.sun.com/j2se/downloads/
- Then download RemoteMaster from the "JP1 File Section": http://www.hifi-remote.com/forums/dload.php?action=file&file_id=1339
- To execute RemoteMaster, open the file "RemoteMaster.jar"
- For more information about Remote Master, go to: http://controlremote.sourceforge.net/
Finding and using device upgrades
You can find device upgrades that other people have already created in the "Device Upgrades" section of the JP1 File Section forum:
http://www.hifi-remote.com/forums/dload.php?action=category&cat_id=4
Once you find an upgrade you want to use with the remote, run RemoteMaster (open the file "RemoteMaster.jar") and open the upgrade file. With the upgrade file open, select the model of your remote control in the drop-down menu at the top of the window. Now click the Layout tab and make sure the remote buttons are oriented with the correct functions. To change what function is assigned to a button, right-click it and select the function you want.
Once you have everything in RemoteMaster set the way you want it, click the Output tab. Here is the data that the IR program will use, click the copy button and go back to IR. In the IR program, under the Devices tab, click the Add button. In the window that appears, paste the data you copied from RemoteMaster in the top textbox. Then just say ok. Now all you have to do is assign the upgrade's setup code to one of your remote's device keys and upload the settings back to the remote.
How to create your own device upgrades
If your remote has a learning feature, you can also use IR and RemoteMaster to create your own device upgrades if you can't find one that works with your device. Once your remote control has learned the keys you want to put in the device upgrade, download the remote's data with IR. Under the Learned Signals tab, click one of the buttons you want to use with the upgrade, and note the button's Protocol and the Device Code. Then go back to RemoteMaster and change the Protocol and Device code to match what you got from the entry in IR. One last thing, assign the upgrade a Setup Code.
Once you get the device setup, create and map the individual functions. Using the Learned Signals in IR, note either the EFC, OBC, or Hex Command for the function you want to create, and enter it into the Functions list in RemoteMaster. When you enter one of those three numbers into a function in RemoteMaster, it will calculate the rest. Once you create all the functions you need, just map them to the buttons like you did before, and copy the output to IR. Then just setup a device that uses the Setup Code you assigned to the upgrade, and you're done. If you create a device upgrade you think someone else may have a use for, you can share it by uploading it to the "Device Upgrades" section of the JP1 File Section forum.
Conclusion
I have had great success using these techniques with my One For All URC-9910 universal remote control. This stuff works so well, I don't understand why most remote control manufacturers don't include a cable and their own version of this software with their remotes. It would certainly make configuring and upgrading these remotes a lot easier for both the customers and the remote manufacturer's support team.
The article is provided by J.M, a member of JP1 community at http://www.hifi-remote.com
You can download the original WORD version of the article at: Media:Hacking_JP1_Remote_Controls.pdf
Thanks J.M.!

10 PCS, 10cm x 10cm, 2 layers prototype for $38.80 shipped!


