Difference between revisions of "TIAO GBoard (ATMEGA32u4/FT231x) Manual"

10 PCS, 10cm x 10cm, 2 layers prototype for $38.80 shipped!
(Created page with "TIAO GBoard is a development board for rapid AVR development. Th GBoard is powered by an ATMEGA32U4 and FT231x. The ATMEGA32U4 pre-programmed with the AVR's DFU bootloader w...") |
|||
| (14 intermediate revisions by the same user not shown) | |||
| Line 3: | Line 3: | ||
Th GBoard is powered by an ATMEGA32U4 and FT231x. The ATMEGA32U4 pre-programmed with the AVR's DFU bootloader which allows code to be programmed inside the chip without any external programmer. | Th GBoard is powered by an ATMEGA32U4 and FT231x. The ATMEGA32U4 pre-programmed with the AVR's DFU bootloader which allows code to be programmed inside the chip without any external programmer. | ||
| − | + | == Inspect hardware == | |
The GBoard can work in 5V mode or 3.3V mode. The default voltage is 5V, which is configurable via jumper J5. Short J5's 1-2 for 5V mode, short J5's 2-3 for 3.3V mode. | The GBoard can work in 5V mode or 3.3V mode. The default voltage is 5V, which is configurable via jumper J5. Short J5's 1-2 for 5V mode, short J5's 2-3 for 3.3V mode. | ||
| Line 11: | Line 11: | ||
Make sure no jumpers on J1 and J2 for now. | Make sure no jumpers on J1 and J2 for now. | ||
| − | + | == Load firmware to ATMEGA32U4 == | |
| − | == Windows == | + | === Windows === |
| − | + | On Windows machines, you can load the firmware by using Flip or DFU-programmer. | |
| − | + | ==== DFU Programmer ==== | |
| − | + | The easiest way to load firmware is the DFU programmer | |
| − | + | ||
| − | + | # Do not plug the GBoard yet | |
| − | + | # Download the DFU Programmer from [https://dfu-programmer.github.io/] | |
| + | # Unzip the downloaded zip file to a folder, e.g. c:/temp/driver | ||
| + | # Plug the GBoard's ATMEGA32U4 USB connector to your computer using a USB A to Mini USB B cable. There are 2 Mini USB connectors on the GBoard, one is for FT231x and one is for ATMEGA32U. The ATMEGA32U one is next to S1 switch. | ||
| + | # Go to device manager, you should see Atmega32u, right mouse click on it and select "Update driver software" | ||
| + | # The downloaded DFU-programmer contains windows drivers for ATMEGA32U, point the driver location to c:/temp/driver/dfu-prog-usb-1.2.2, then select Next to continue the installation of the driver. | ||
| + | # Once the driver is installed, open a DOS command prompt window, change the current directory to the directory you have decompressed the DFU programmer zip file | ||
| + | # Run command "dfu-programmer atmega32u4 erase" to empty the chip. | ||
| + | # Run command "dfu-programmer atmega32u4 flash <path to hex> file" to load the firmware to the chip | ||
| + | # Run command "dfu-programmer atmega32u4 reset" to safely remove unplug the GBoard from your PC. | ||
| + | [[image:Dfu-programmer-win.png|none]] | ||
| + | |||
| + | ==== Flip from Atmel ==== | ||
| + | Flip is a Java program provided by Ateml. | ||
| + | |||
| + | # Do not plug the GBoard to your Windows machine yet, as there is no driver at this moment. | ||
| + | # Download the Flip software from [http://www.atmel.com/tools/FLIP.aspx]. If you do not have Java installed on your Windows, download the package with embedded java version, otherwise download the smaller package one. | ||
| + | # Install the Flip software. The installation is straightforward. This will also install the drivers for AVR microchips, so when you connect the GBoard to your computer you have drivers to install. | ||
| + | # Plug the GBoard's ATMEGA32U4 USB connector to your computer using a USB A to Mini USB B cable. There are 2 Mini USB connectors on the GBoard, one is for FT231x and one is for ATMEGA32U. The ATMEGA32U one is next to S1 switch. | ||
| + | # Windows should pop up a 'Found new hardware" dialog. [[image:Newdevice.png|none]] Click on it to install the driver. If you do not see this, go to control panel, and open device manager, you should see something like: [[image:Atmega32u4-dm.png|none]], right mouse click and select update driver software. | ||
| + | # Select browse my computer for driver software: [[Image:Updatedriver.png|none]] | ||
| + | # The driver software is installed under Flip installation directory: "C:\Program Files (x86)\Atmel\Flip 3.4.7\usb": [[image:Driverlocation.png|none]] click "Next". | ||
| + | # Windows may pop up a dialog windows similar to this: [[Image:Driverwarning.png||none]], select "Install". | ||
| + | # After driver is successfully installed, you will see this: [[Image:Dirverdone.png||none]]. Click "Close" to close the dialog | ||
| + | # Now launch Atmel Flip, click the target device icon: [[Image:Fliptargerdeivce.png||none]] then select ATMEGA32U4 in the target device list: [[Image:Flipatmega32u4.png||none]] Click OK | ||
| + | # Select USB as the communication medium: [[image:flipcomm.png|none]] and click Open: [[image:flipcommopen.png||none]] | ||
| + | # Load HEX: [[image:Fliploadhex.png||none]] Select corresponding firmware for ATMEGA32U4. Since I am going to use it for PS3, I select EMUPS3/atmega32u4.hex: [[Image:flipselectfw.png||none]] | ||
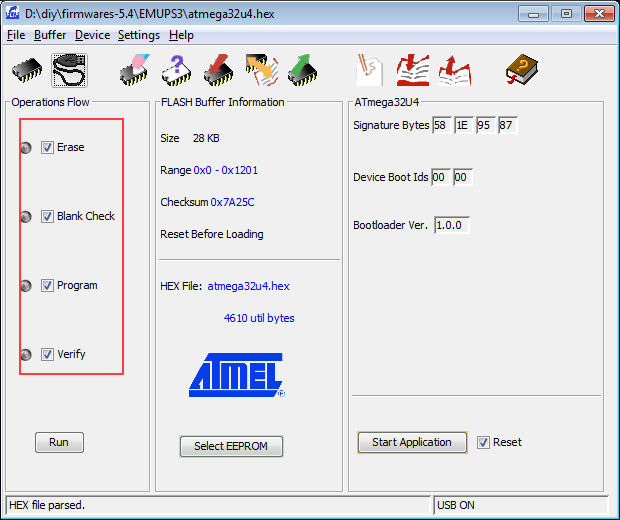
| + | # Make sure Erase, Blank Check, Program and Verify is checked, then click Run: [[Image:Fliprun.png||none]] | ||
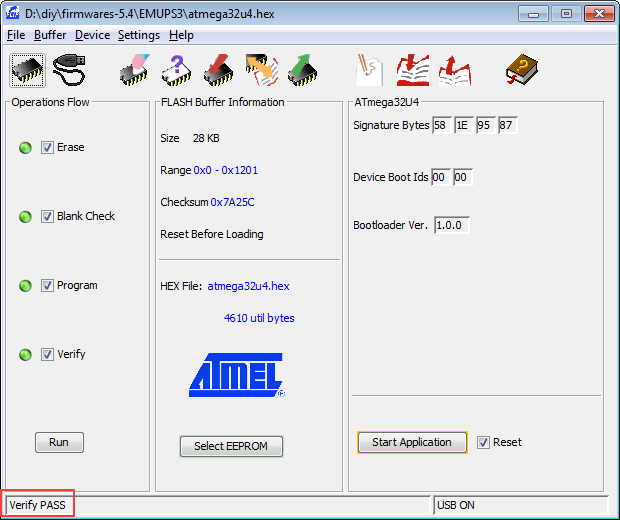
| + | # Now you have loaded the firmware to your GBoard: [[Image:flipdone.png||none]] | ||
| + | |||
| + | |||
| + | === Linux === | ||
| + | ==== DFU-Programmer ==== | ||
| + | |||
| + | On Linux machines, you can load the firmware by using DFU-programmer. You can download DFU-Programmer directly or install it from the repository. | ||
| + | I am using Ubuntu as an example. | ||
| + | |||
| + | # Install DFU-Programmer: "sudo apt-get install dfu-programmer" | ||
| + | # Plug the GBoard to your Linux machine | ||
| + | # Run command "dfu-programmer atmega32u4 erase" to empty the chip. | ||
| + | # Run command "dfu-programmer atmega32u4 flash <path to hex> file" to load the firmware to the chip | ||
| + | # Run command "dfu-programmer atmega32u4 reset" to safely remove unplug the GBoard from your PC. | ||
| + | |||
| + | If you see "dfu-programmer: no device present", then it means your Linux box cannot find Atmega32u4. This is likely to be a DFU / Linux kernel issue on autosuspend ([https://sourceforge.net/p/dfu-programmer/mailman/message/504454/]). The solution is to disable autosuspend on Atmega32u4: "echo -n -1 > /sys/module/usbcore/parameters/autosuspend". Otherwise the steps are the sane wuth DFU-Programmer on Windows. | ||
| + | |||
| + | |||
| + | == Force into bootloader mode == | ||
| + | If your have previously programmed your ATMEGA32U4 and you would like to flash a new firmware, you can do this easily. By holding the S1 button on the board before you plug it to your PC, then release it, the device will be forced into bootloader mode, and then you can program the chip again. | ||
Latest revision as of 02:58, 17 February 2016
TIAO GBoard is a development board for rapid AVR development.
Th GBoard is powered by an ATMEGA32U4 and FT231x. The ATMEGA32U4 pre-programmed with the AVR's DFU bootloader which allows code to be programmed inside the chip without any external programmer.
Contents
Inspect hardware
The GBoard can work in 5V mode or 3.3V mode. The default voltage is 5V, which is configurable via jumper J5. Short J5's 1-2 for 5V mode, short J5's 2-3 for 3.3V mode.
If you are using the GBoard for GMIX development, please make sure the jumper is at 5V (1-2 on J5).
Make sure no jumpers on J1 and J2 for now.
Load firmware to ATMEGA32U4
Windows
On Windows machines, you can load the firmware by using Flip or DFU-programmer.
DFU Programmer
The easiest way to load firmware is the DFU programmer
- Do not plug the GBoard yet
- Download the DFU Programmer from [1]
- Unzip the downloaded zip file to a folder, e.g. c:/temp/driver
- Plug the GBoard's ATMEGA32U4 USB connector to your computer using a USB A to Mini USB B cable. There are 2 Mini USB connectors on the GBoard, one is for FT231x and one is for ATMEGA32U. The ATMEGA32U one is next to S1 switch.
- Go to device manager, you should see Atmega32u, right mouse click on it and select "Update driver software"
- The downloaded DFU-programmer contains windows drivers for ATMEGA32U, point the driver location to c:/temp/driver/dfu-prog-usb-1.2.2, then select Next to continue the installation of the driver.
- Once the driver is installed, open a DOS command prompt window, change the current directory to the directory you have decompressed the DFU programmer zip file
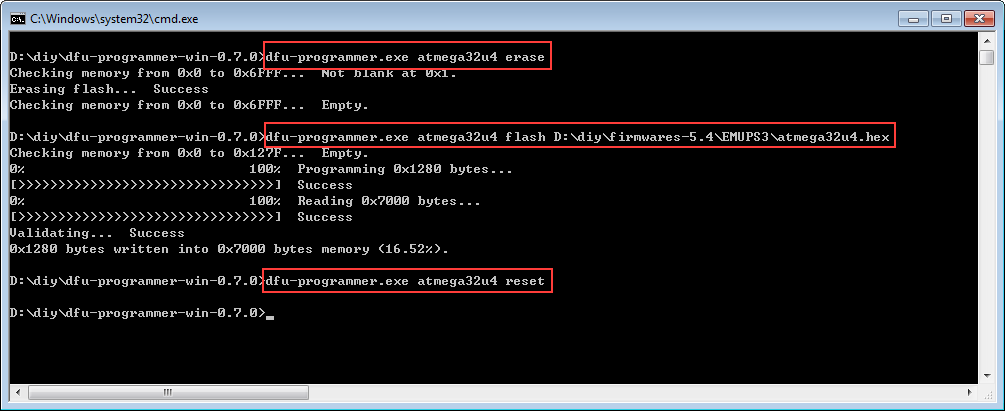
- Run command "dfu-programmer atmega32u4 erase" to empty the chip.
- Run command "dfu-programmer atmega32u4 flash <path to hex> file" to load the firmware to the chip
- Run command "dfu-programmer atmega32u4 reset" to safely remove unplug the GBoard from your PC.
Flip from Atmel
Flip is a Java program provided by Ateml.
- Do not plug the GBoard to your Windows machine yet, as there is no driver at this moment.
- Download the Flip software from [2]. If you do not have Java installed on your Windows, download the package with embedded java version, otherwise download the smaller package one.
- Install the Flip software. The installation is straightforward. This will also install the drivers for AVR microchips, so when you connect the GBoard to your computer you have drivers to install.
- Plug the GBoard's ATMEGA32U4 USB connector to your computer using a USB A to Mini USB B cable. There are 2 Mini USB connectors on the GBoard, one is for FT231x and one is for ATMEGA32U. The ATMEGA32U one is next to S1 switch.
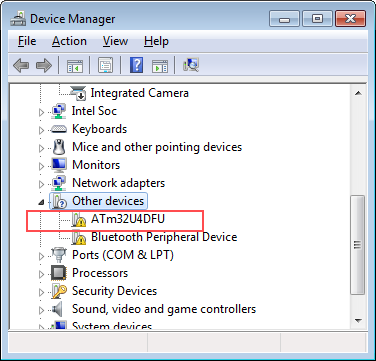
- Windows should pop up a 'Found new hardware" dialog. Click on it to install the driver. If you do not see this, go to control panel, and open device manager, you should see something like: , right mouse click and select update driver software.
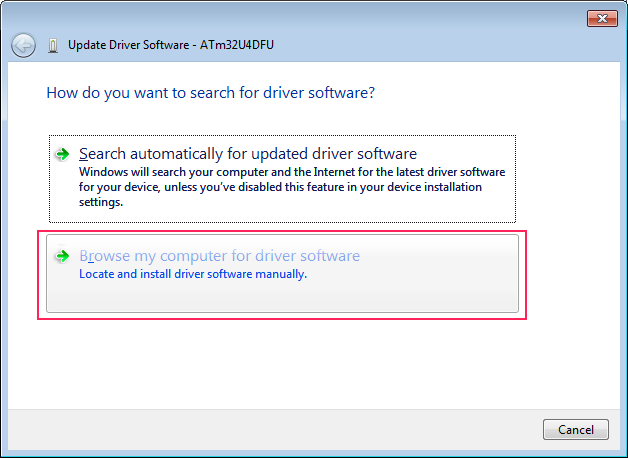
- Select browse my computer for driver software:
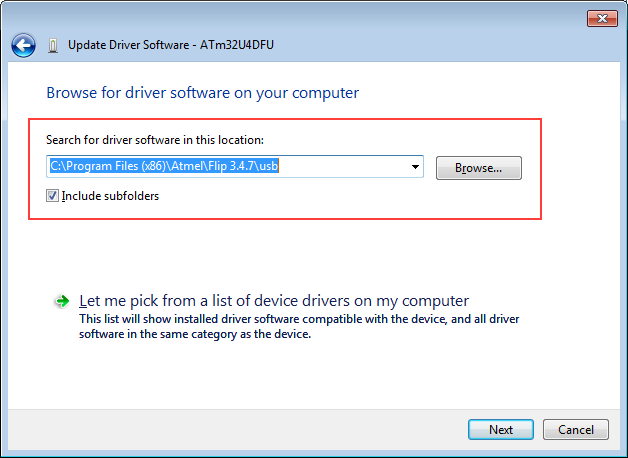
- The driver software is installed under Flip installation directory: "C:\Program Files (x86)\Atmel\Flip 3.4.7\usb": click "Next".
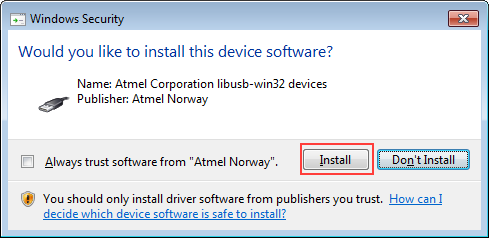
- Windows may pop up a dialog windows similar to this: , select "Install".
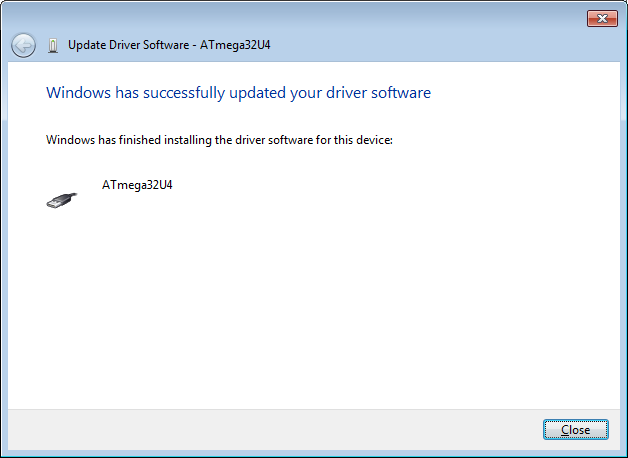
- After driver is successfully installed, you will see this: . Click "Close" to close the dialog
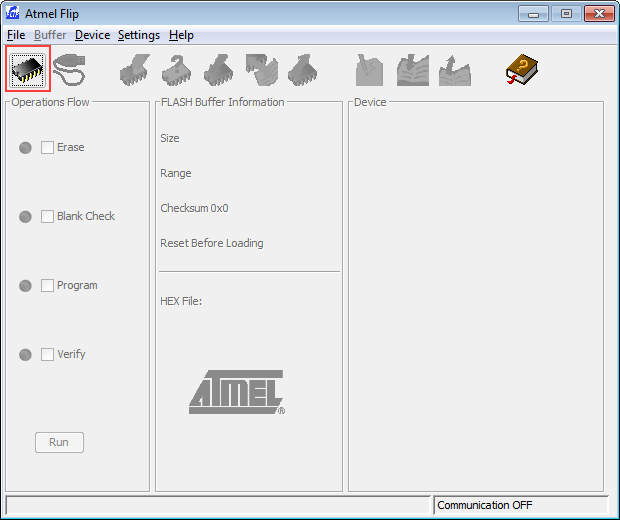
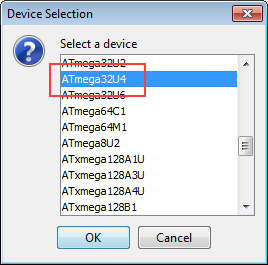
- Now launch Atmel Flip, click the target device icon: then select ATMEGA32U4 in the target device list: Click OK
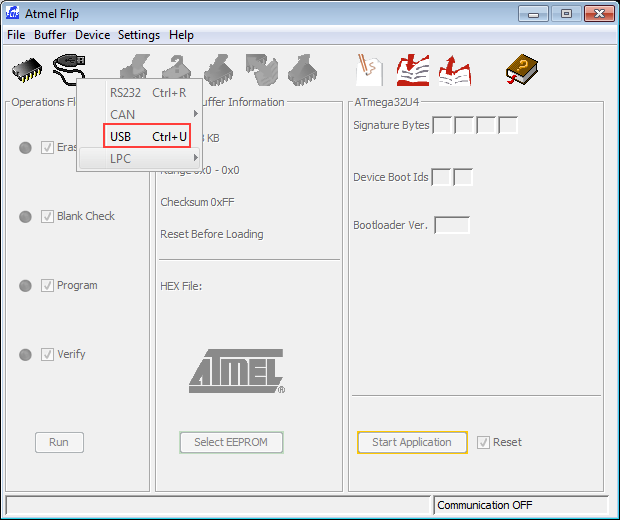
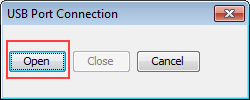
- Select USB as the communication medium: and click Open:
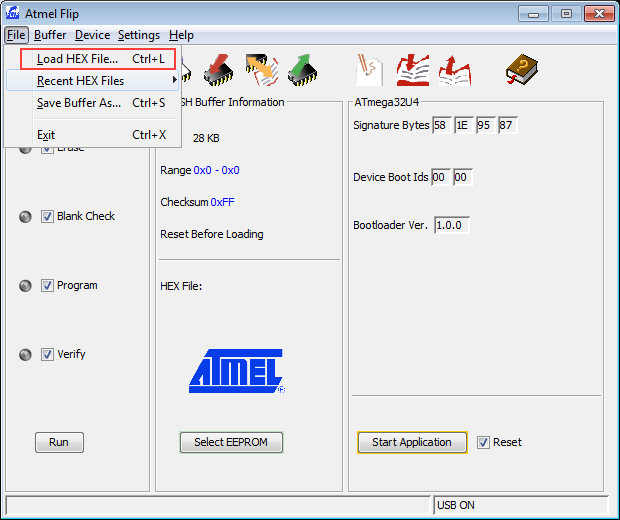
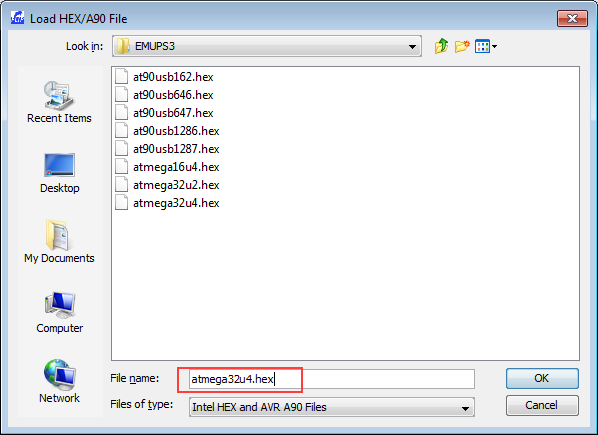
- Load HEX: Select corresponding firmware for ATMEGA32U4. Since I am going to use it for PS3, I select EMUPS3/atmega32u4.hex:
- Make sure Erase, Blank Check, Program and Verify is checked, then click Run:
- Now you have loaded the firmware to your GBoard:
Linux
DFU-Programmer
On Linux machines, you can load the firmware by using DFU-programmer. You can download DFU-Programmer directly or install it from the repository. I am using Ubuntu as an example.
- Install DFU-Programmer: "sudo apt-get install dfu-programmer"
- Plug the GBoard to your Linux machine
- Run command "dfu-programmer atmega32u4 erase" to empty the chip.
- Run command "dfu-programmer atmega32u4 flash <path to hex> file" to load the firmware to the chip
- Run command "dfu-programmer atmega32u4 reset" to safely remove unplug the GBoard from your PC.
If you see "dfu-programmer: no device present", then it means your Linux box cannot find Atmega32u4. This is likely to be a DFU / Linux kernel issue on autosuspend ([3]). The solution is to disable autosuspend on Atmega32u4: "echo -n -1 > /sys/module/usbcore/parameters/autosuspend". Otherwise the steps are the sane wuth DFU-Programmer on Windows.
Force into bootloader mode
If your have previously programmed your ATMEGA32U4 and you would like to flash a new firmware, you can do this easily. By holding the S1 button on the board before you plug it to your PC, then release it, the device will be forced into bootloader mode, and then you can program the chip again.

10 PCS, 10cm x 10cm, 2 layers prototype for $38.80 shipped!
